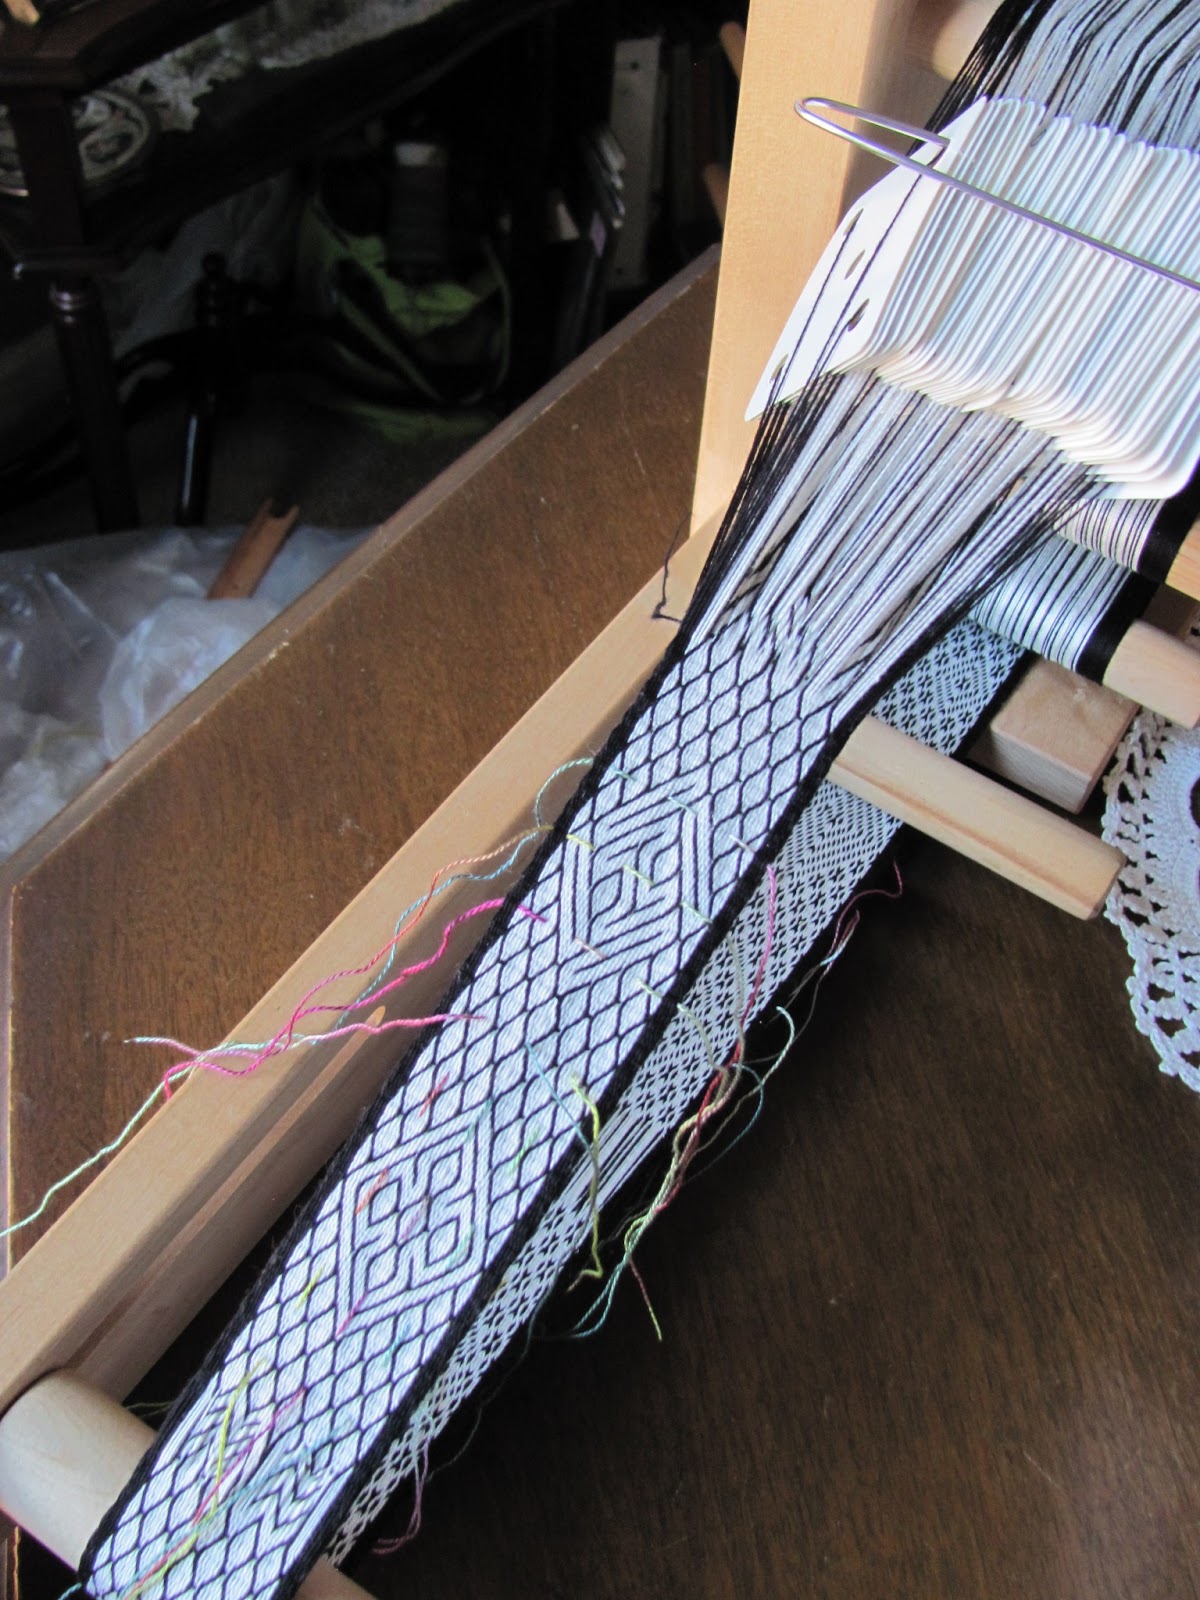
I recently received an email from a student which contained a picture of bands they had woven since my class with them. What is so cool is that there were four! This in less than a month's time! I was in Bloomington IN with the Bloomington Spinners & Weavers Guild at the beginning of April. I've been there before, and it is a great group of weavers.
Card weaving is such a specialized weaving technique, and there really aren't that many of us dedicated to it when you look at the broader weaving population. So I'm always thrilled when I get at least one student in a class who really likes it enough to start exploring it on their own. And I'm more thrilled when they share what they've been working on with me. Kathleen was one of those students. And she's told me that she is going to demonstrate at an art fair for students. Even better!
This is why we teach. If you asked me to not talk about card weaving, I don't really think I could do it. So the fact that I'm allowed to share my passion with other people, and see that sometimes they share that passion as well is a reward beyond measure.
More sharing next week with the Jockey Hollow Weavers Guild in New Jersey! I can't wait!
PS: Alright Daryl! Bring on the "Battle of the Bands!" Tablet woven bands are much more boss than inkle bands!
Monday, April 29, 2013
Saturday, March 23, 2013
Ply Split Braiding Fun
Last weekend I enjoyed a St. Louis Weavers' Guild workshop on Ply-Split Braiding with Louise French.
I had taken a quick course from Linda Hendrickson at Convergence several years ago, and it looked interesting, but I wasn't willing to split any time away from my card weaving. And the idea of making the cords that were to be split looked quite tedious.
Well, let me tell you how wrong I was! The cord making is actually very fun and makes up a huge part of the creative process in ply-splitting. Plus, there was great fun in just playing with the different splitting techniques.
I knew that many card weavers were also ply-split braiders, and now it makes sense why. We (card weavers) split the plys with the weft as we are plying the threads in each card. The draft tells us what color threads go where. But one can take a card weaving draft, create cords to ply split using the draft and get the same pattern! The only problem is that unlike card weaving where I can change the direction of my plies from Z to S (turning cards forward and back), the ply direction of the cords for splitting is stuck in the one direction I created it. Hmm, seems to be an opportunity here to figure out a way to make a cord with different ply directions.
As soon as I get some card weaving drafts translated and cords made and split into something interesting, I'll post pics here.
Actually finished this necklace.
I had taken a quick course from Linda Hendrickson at Convergence several years ago, and it looked interesting, but I wasn't willing to split any time away from my card weaving. And the idea of making the cords that were to be split looked quite tedious.
Well, let me tell you how wrong I was! The cord making is actually very fun and makes up a huge part of the creative process in ply-splitting. Plus, there was great fun in just playing with the different splitting techniques.
I knew that many card weavers were also ply-split braiders, and now it makes sense why. We (card weavers) split the plys with the weft as we are plying the threads in each card. The draft tells us what color threads go where. But one can take a card weaving draft, create cords to ply split using the draft and get the same pattern! The only problem is that unlike card weaving where I can change the direction of my plies from Z to S (turning cards forward and back), the ply direction of the cords for splitting is stuck in the one direction I created it. Hmm, seems to be an opportunity here to figure out a way to make a cord with different ply directions.
As soon as I get some card weaving drafts translated and cords made and split into something interesting, I'll post pics here.
Actually finished this necklace.
Friday, March 1, 2013
Woven Shibori with Card Weaving?
Our guild's challenge this year is woven shibori. Shibori is a dyeing technique using stitching, clamps or other ways to resist the dye. Woven shibori is weaving ties into the hand woven piece. An example might be weaving the pattern threads of an Overshot with ties instead of a pattern yarn. Then tying up the piece and throwing it in a dye pot. You can read more from Catherine Ellis' website.
My good friend Amy wanted a small group of us guildies to document our trials with woven shibori in our individual favorite techniques. This was beginning to sound like the iridescent challenge where we argued back and forth that you can't do it with tablet weaving. "But how do you know unless you try?" And it did work. And it probably will work with woven shibori.
So here it is woven up before tying and dyeing. We're doing the dyeing sometime in May, so you'll have to wait until then for the finished samples.
The pattern is 3 white, 1 black thread in each card setup to be similar to patterns found on coptic bands.
The colored threads are the ties. They aren't really woven in, they are more threaded between. I tried a sample with the ties woven in, but card woven bands are so thick I was afraid it wouldn't gather enough to resist the dyes. We'll see how this all works after the dye pot.
My good friend Amy wanted a small group of us guildies to document our trials with woven shibori in our individual favorite techniques. This was beginning to sound like the iridescent challenge where we argued back and forth that you can't do it with tablet weaving. "But how do you know unless you try?" And it did work. And it probably will work with woven shibori.
So here it is woven up before tying and dyeing. We're doing the dyeing sometime in May, so you'll have to wait until then for the finished samples.
Thursday, February 7, 2013
Pin Loom Reboot: Schacht Zoom Loom
It took more than three years, but at last, it is finished!
Schacht Spindle Company is producing a new pin loom I designed. They are calling it the Zoom Loom. You can check it out here. The box even says "Designed with John Mullarkey."
This all started at a Midwest Weavers Conference in 2009 when I attended a seminar on weaving with pin looms. The teacher was very nice. Had plenty of Weavettes and Weave-it looms to share. And we all had a great time. But by the end of the seminar, everyone was complaining about how it was hard to hold, and the first and last rows were really difficult to weave. And I don't know why, but they all looked to me like I should do something about it.
By October of that year, I decided I would. No one was manufacturing these looms anymore. There were some hand made ones being put out with varying degrees of quality, but none had any of the features those students were looking for. So I hired an industrial engineer, and we got to work.
Unfortunately I re-learned an important lesson. You get what you pay for, and I had a budget industrial designer. He was very good at design work, but very bad at schedules. The other lesson I re-learned was knowing when to cut loose and move on. I worked with him for far too long. But he was a really good designer, and I still thank him for helping me get to the point we did.
So when I finally fired him, my good friend Amy suggested that I pitch this loom to Schacht. They make looms, why not this one? That was inspired! I would lose some control, but they already have the marketing and manufacturing experience, and honestly I was more interested in seeing this be produced than it being John's Loom (I was going to call it the Lotto Loom - In a small package). So thank you Schacht for taking this project on and seeing it through to completion.
So why is this new pin loom so awesome when there are already plenty of hand crafted pin looms out there being made by wonderful husbands hammering nails into squares? It has a nice wide base that makes it easy to grip. The interior sides are sloped to guide the needle right to the place it needs to be. It has measurements right on the loom, so I don't have to dig out instructions to figure out how long a length I need, or how many wraps I need to do. And it has this wonderful little notch to hold the starting thread, so no knots required.
The loom should be in retail outlets in April. Let me know if you want one, I think I can get you a deal.
Schacht Spindle Company is producing a new pin loom I designed. They are calling it the Zoom Loom. You can check it out here. The box even says "Designed with John Mullarkey."
![]() |
| TNNA In Long Beach CA Feb, 2013 |
This all started at a Midwest Weavers Conference in 2009 when I attended a seminar on weaving with pin looms. The teacher was very nice. Had plenty of Weavettes and Weave-it looms to share. And we all had a great time. But by the end of the seminar, everyone was complaining about how it was hard to hold, and the first and last rows were really difficult to weave. And I don't know why, but they all looked to me like I should do something about it.
By October of that year, I decided I would. No one was manufacturing these looms anymore. There were some hand made ones being put out with varying degrees of quality, but none had any of the features those students were looking for. So I hired an industrial engineer, and we got to work.
Unfortunately I re-learned an important lesson. You get what you pay for, and I had a budget industrial designer. He was very good at design work, but very bad at schedules. The other lesson I re-learned was knowing when to cut loose and move on. I worked with him for far too long. But he was a really good designer, and I still thank him for helping me get to the point we did.
So when I finally fired him, my good friend Amy suggested that I pitch this loom to Schacht. They make looms, why not this one? That was inspired! I would lose some control, but they already have the marketing and manufacturing experience, and honestly I was more interested in seeing this be produced than it being John's Loom (I was going to call it the Lotto Loom - In a small package). So thank you Schacht for taking this project on and seeing it through to completion.
So why is this new pin loom so awesome when there are already plenty of hand crafted pin looms out there being made by wonderful husbands hammering nails into squares? It has a nice wide base that makes it easy to grip. The interior sides are sloped to guide the needle right to the place it needs to be. It has measurements right on the loom, so I don't have to dig out instructions to figure out how long a length I need, or how many wraps I need to do. And it has this wonderful little notch to hold the starting thread, so no knots required.
The loom should be in retail outlets in April. Let me know if you want one, I think I can get you a deal.
Tuesday, December 4, 2012
Card Weaving Holiday Bands
Here are some holiday bands that the Weavers' Guild of St. Louis' Long & Skinny study group designed and wove.
It isn't too late to create some fun card woven trim for you tree, or bands to wrap presents in, or bands as presents! Included are the card weaving drafts to weave them yourself. If you need a refresher in basic card weaving instruction, you can check out my instructions at www.malarkycrafts.com.


It isn't too late to create some fun card woven trim for you tree, or bands to wrap presents in, or bands as presents! Included are the card weaving drafts to weave them yourself. If you need a refresher in basic card weaving instruction, you can check out my instructions at www.malarkycrafts.com.
Santa Claus by Marilyn Holtzer
Snowmen by JoAnn Treumann
Wreaths by Dale Goad
Snow Trees by me.
Three Kings by Marilyn Holtzer
Christmas Trees by Luise Hoffman
Rudolph by Dale Goad
Thursday, August 2, 2012
Wool swim trunks?
I created some swim trunks for the "Look Ma No Sleeves" garment challenge that Handwoven sponsored last Spring. I started late which was the inspiration for a small garment, and I used weave-it looms to make squares that I could travel with rather than try to get yardage woven on a floor loom in the allotted time. They also had a category for using knitting yarns, and I thought that would be just perfect.
Unfortunately, as creative as I thought I was being in not submitting another vest, the judges did not construe swim trunks as a sleeveless garment, so I did not get selected as an entrant. Fortunately, they were enamored with the trunks enough to publish them in Handwoven anyway because of their creative construction.
So here is a little more information on those wool swim trunks. And no, I haven't actually gone swimming with them yet, but I hope to soon! They are superwash, so they shouldn't full and shrink on me, right?
The yarn was Fiesta Yarn's Boomerang superwash wool sock yarn that I had 3 skeins of hiding in my knitting yarn stash.

Here I was trying to play with the layout of the squares to maximize coverage and figure out just how many squares I was going to have to weave. Three to five squares per night, weave the bands on the weekends, I might just be able to do this!


After the squares were sewn together, I ironed fusable interfacing to the wrongside so the squares wouldn't unweave as soon as we cut them. Dale was very helpful here as well pinning and ironing seams as I feverishly sewed. We then began to realize just how short these trunks were going to be. Not my original intention.
Each panel was one leg and required 12 6x6" squares and 10 4x4". So that was a total of 24 6x6 and 20 4x4 for the entire thing. If I had had time I would have added another row of the 4x4 to the bottom to give the trunks some much needed length.
The waistband had to be hollow in order to run a cord through so I could have an adjustable waist band. And as heavy as these trunks were going to be wet, I wanted to make absolutely certain they stayed on in the water!
By putting the cards on their points you get two sheds and can weave two inkle bands joined at the selvedges. Just make sure not to cross the threads or the two bands will be joined forever.
We had a lot of fun having various family members try on the shorts to see who was going to be my model for the pictures I had to send to Handwoven for the competition. My niece said she would try them on if her brother would thinking that that was a safe bet because I wasn't going to be able to talk him into it.

Well, she lost that bet, but we decided my nephew's chicken legs and lack of butt (much like myself) were not very flattering. So this picture didn't make the cut.
Her's was so cute that she got the honor of representing the trunks at Handwoven. (Shhh, don't tell anyone, but you can see I only had the band sewn onto one leg at this point.)
The trunks were a complete success! Everyone who sees them smiles and chuckles. The perfect response to something as whimsical as wool swim trunks.
Unfortunately, as creative as I thought I was being in not submitting another vest, the judges did not construe swim trunks as a sleeveless garment, so I did not get selected as an entrant. Fortunately, they were enamored with the trunks enough to publish them in Handwoven anyway because of their creative construction.
So here is a little more information on those wool swim trunks. And no, I haven't actually gone swimming with them yet, but I hope to soon! They are superwash, so they shouldn't full and shrink on me, right?
The yarn was Fiesta Yarn's Boomerang superwash wool sock yarn that I had 3 skeins of hiding in my knitting yarn stash.

Here I was trying to play with the layout of the squares to maximize coverage and figure out just how many squares I was going to have to weave. Three to five squares per night, weave the bands on the weekends, I might just be able to do this!

A big shout out to Dale Pessin. Without her help I never would have gotten this thing sewn together. I bought a sewing pattern for boxer shorts figuring I could just use that and ignore the opening that usually accompanies boxer shorts. She was so helpful in sizing the pattern to fit me. That led to one or two embarrassing moments however as her husband Bud caught me running around their basement in my underwear. Good thing we're good friends!

After the squares were sewn together, I ironed fusable interfacing to the wrongside so the squares wouldn't unweave as soon as we cut them. Dale was very helpful here as well pinning and ironing seams as I feverishly sewed. We then began to realize just how short these trunks were going to be. Not my original intention.
Each panel was one leg and required 12 6x6" squares and 10 4x4". So that was a total of 24 6x6 and 20 4x4 for the entire thing. If I had had time I would have added another row of the 4x4 to the bottom to give the trunks some much needed length.
The waistband had to be hollow in order to run a cord through so I could have an adjustable waist band. And as heavy as these trunks were going to be wet, I wanted to make absolutely certain they stayed on in the water!
By putting the cards on their points you get two sheds and can weave two inkle bands joined at the selvedges. Just make sure not to cross the threads or the two bands will be joined forever.

Well, she lost that bet, but we decided my nephew's chicken legs and lack of butt (much like myself) were not very flattering. So this picture didn't make the cut.
Her's was so cute that she got the honor of representing the trunks at Handwoven. (Shhh, don't tell anyone, but you can see I only had the band sewn onto one leg at this point.)
The trunks were a complete success! Everyone who sees them smiles and chuckles. The perfect response to something as whimsical as wool swim trunks.
Tuesday, July 10, 2012
Weekend Fun
Last weekend was one of those rare weekends where I just got to play with fiber with good friends all weekend long! I loved it! Thanks so much Vicki and Dwight, Amy and MJ, Craig and Carolyn.
This is the wonderful living room:
The default fiber fun was spinning, and who wouldn't want to with this wonderful space.
But spinning wasn't all we did:
I caught up on some beading. Yes, I am beading now, and unfortunately enjoying it immensely. Curse you Charlene and Amy for getting me involved in yet another interest!!
Ply Splitting by Vicki.
Puzzle making when any of us got bored with fiber.
And of course, lots of food. This particular dish is an Italian Frittata I made for Sunday brunch. I don't cook! Cooking for me is freezer to microwave. I can lift a phone and order delivery as well. That's John cooking! But with much assistance in chopping and consultation I surprised even myself by producing this. Of course the cat is out of the bag, and now my reputation as a kitchen bumbler is completely ruined.
Speaking of cats, this little guy was one of my students a couple of weeks ago at the Midwest Folk and Fiber Festival. Georganne had to feed the little guy every two hours, so an all day class required this little guy's participation. Michelle (who is a cat person) took one look at him and commented "Hmm, cat food." Everyone got a good laugh out of that, but we took it one step further, and decided that would be a great name for the little guy. So meet Cat Food.
He must have learned something in class because when he got home, he decided to show the rest of his family how to card weave as well! Thanks Georganne for the fun picture!
Many thanks to Franklin Habit, and Jacey Boggs for making the festival a very enjoyable event!!!
This is the wonderful living room:
The default fiber fun was spinning, and who wouldn't want to with this wonderful space.
But spinning wasn't all we did:
I caught up on some beading. Yes, I am beading now, and unfortunately enjoying it immensely. Curse you Charlene and Amy for getting me involved in yet another interest!!
Ply Splitting by Vicki.
Puzzle making when any of us got bored with fiber.
And of course, lots of food. This particular dish is an Italian Frittata I made for Sunday brunch. I don't cook! Cooking for me is freezer to microwave. I can lift a phone and order delivery as well. That's John cooking! But with much assistance in chopping and consultation I surprised even myself by producing this. Of course the cat is out of the bag, and now my reputation as a kitchen bumbler is completely ruined.
Speaking of cats, this little guy was one of my students a couple of weeks ago at the Midwest Folk and Fiber Festival. Georganne had to feed the little guy every two hours, so an all day class required this little guy's participation. Michelle (who is a cat person) took one look at him and commented "Hmm, cat food." Everyone got a good laugh out of that, but we took it one step further, and decided that would be a great name for the little guy. So meet Cat Food.
He must have learned something in class because when he got home, he decided to show the rest of his family how to card weave as well! Thanks Georganne for the fun picture!
Many thanks to Franklin Habit, and Jacey Boggs for making the festival a very enjoyable event!!!
Subscribe to:
Posts (Atom)